Requirements Review Criteria
Navigating to your bid question requirements
To be able to review your bid question requirements, you first need to go to your bid library using the sidebar, then click on the bid you want to view.
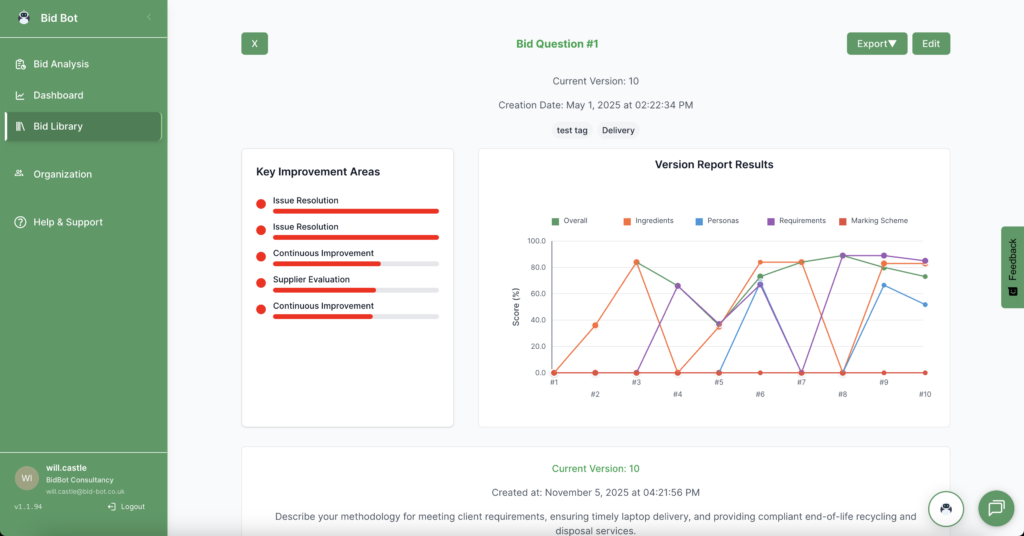
Once you are viewing your bid find the bid question you want to view by scrolling down to the bid question list and horizontally scroll the bid question to find the view button.
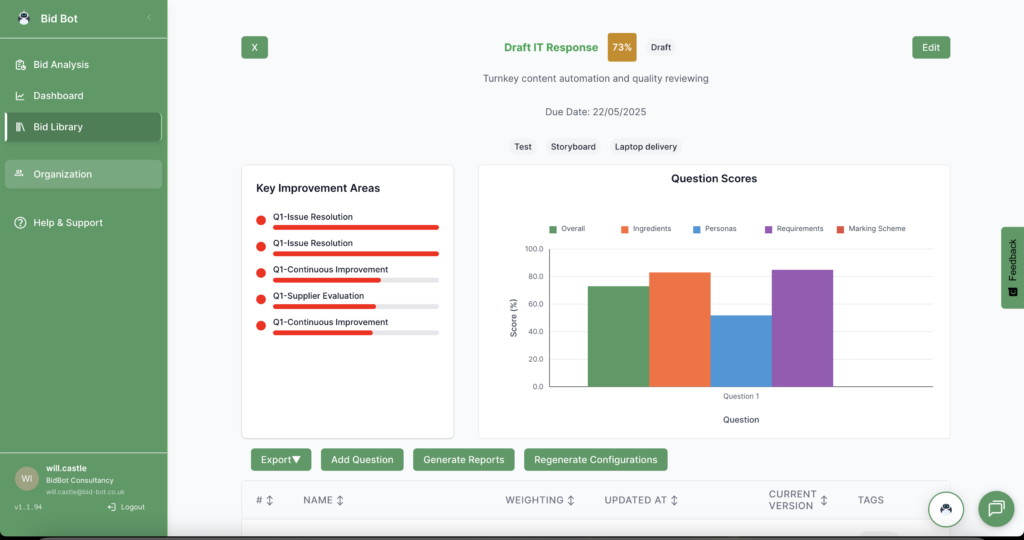

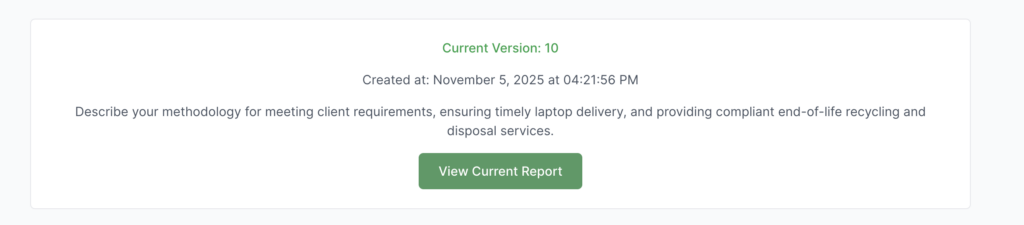
Once you are on the bid question page scroll down to the “View Current Report” button to view the Bid Response page which shows the current version of the bid question, answer, and report.
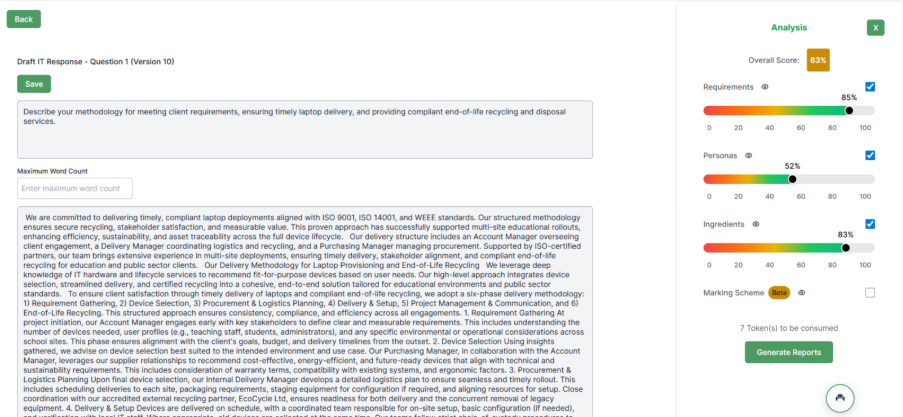
Below is the analysis panel which show the report for the current response it also allows you to customise the reports you want to run. If the current version doesn’t have a report you will not see any score related information.

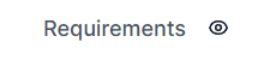
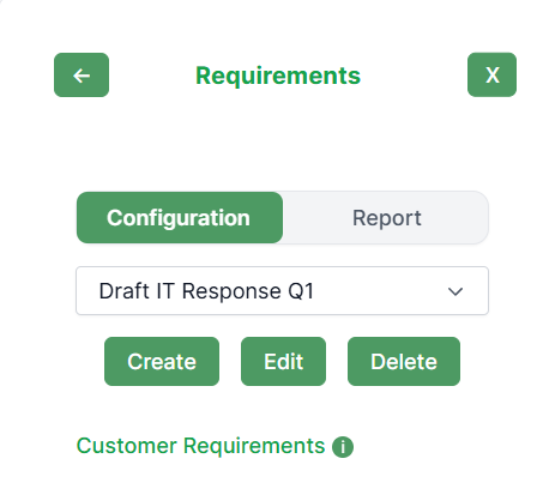
The eye icon – by clicking on it you will be taken to the requirements panel where you can review the criteria and report.
Requirements page
We will cover each element of this page now.
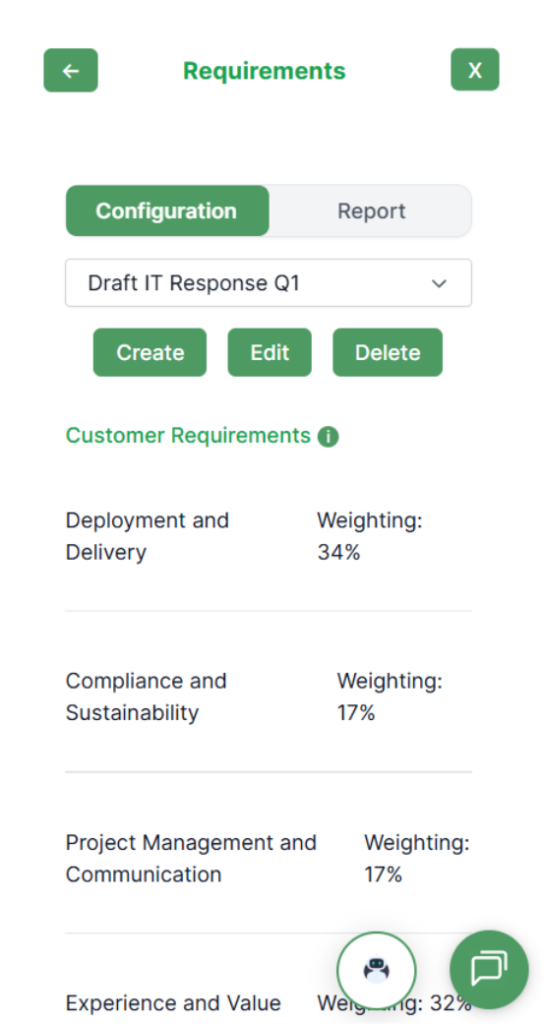
Requirements, title, arrow and X button – the arrow will let you go back to the main review sidebar where you previously were. The requirements is the title for this sidebar bar and the X will remove the sidebar to create more room. Click back on the show analysis to get the sidebar back up.
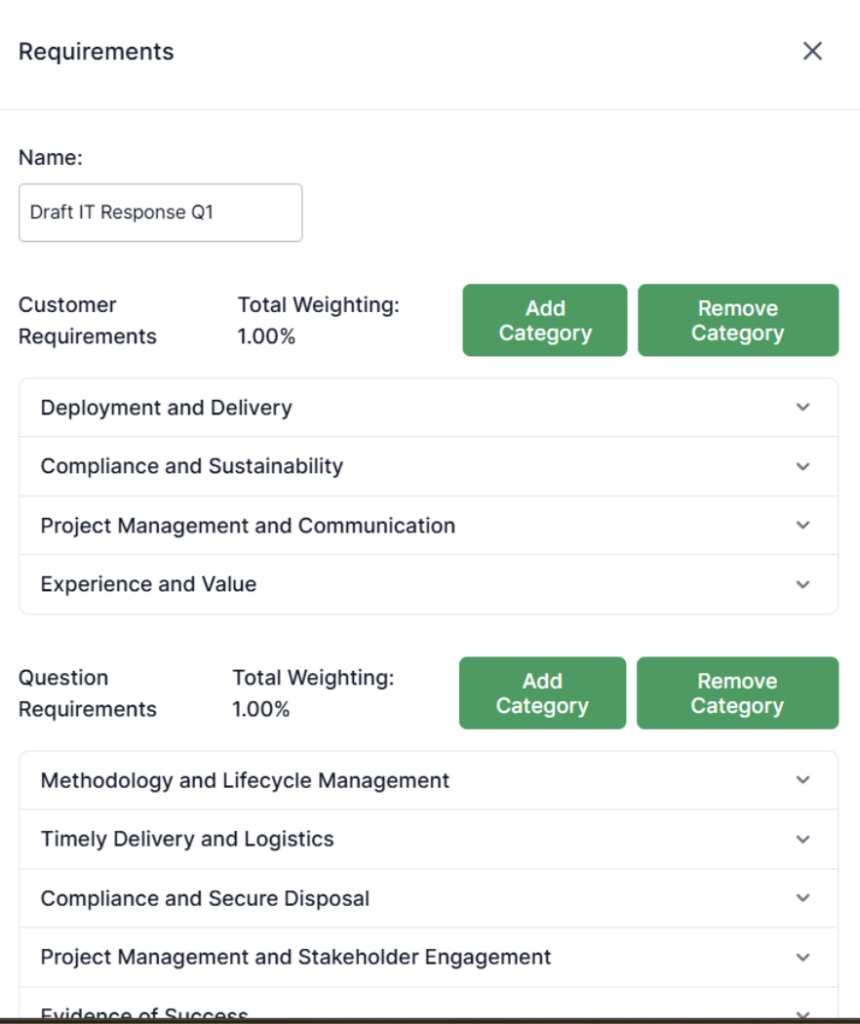
Configuration and report – this is where you can configure your requirements if you did not create them when you did a full bid upload. Both customer and question requirements will assess the answer box based off the customer documentation you upload.
The configuration button is not clickable once on as the actions are further down (create, edit and delete). You can also create your own requirements or edit existing ones. The report button will allow you to if the report has been ran, view the data for the requirements, which we will cover further down. Check out this training guide for a deep dive on requirements – https://www.bid-bot.co.uk/knowledge-base/how-do-i-create-edit-and-add-requirements-on-the-bid-response-page/?seq_no=2

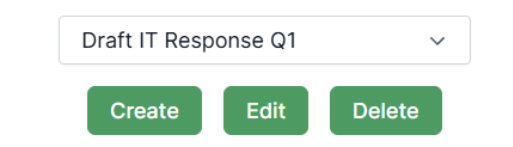
Saved and previous requirements, create, edit and delete – here you can view previous requirements created, create a new set of requirements, and delete them. Important – always check you are running against the right requirements for the bid and question. If there was a bid similar don’t use the requirements, as they won’t be directly specific to this one, you could look at them for inspiration, if for example, you did some custom value adds or evidence, or you are building for the same customer and what they like.
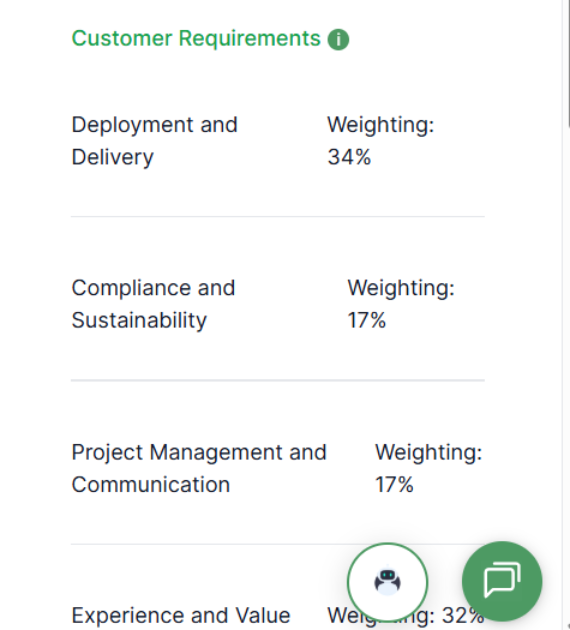
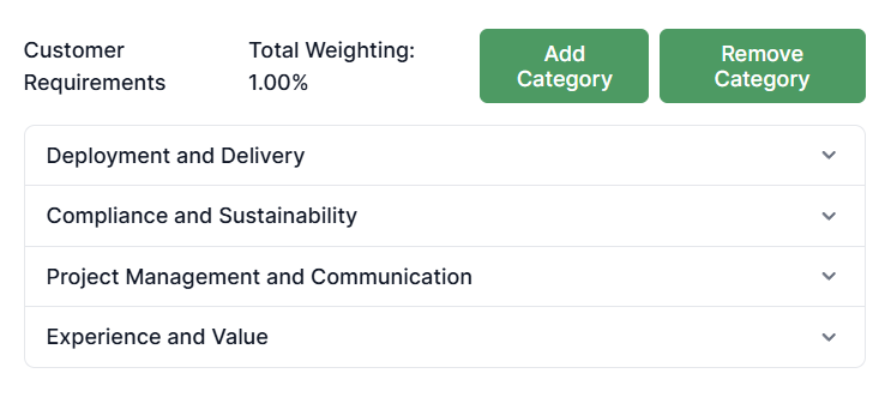
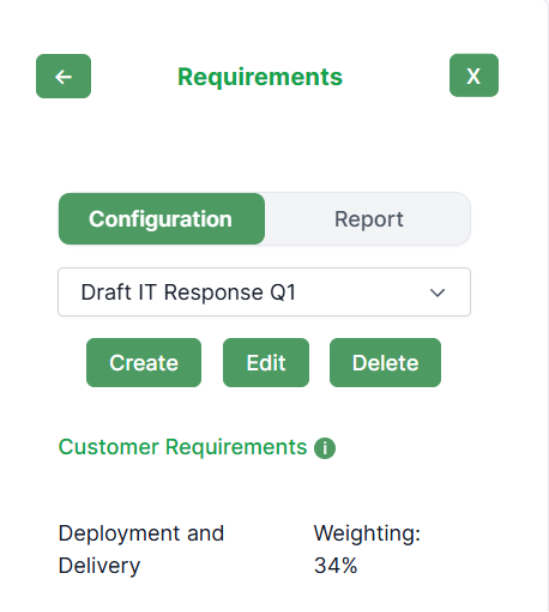
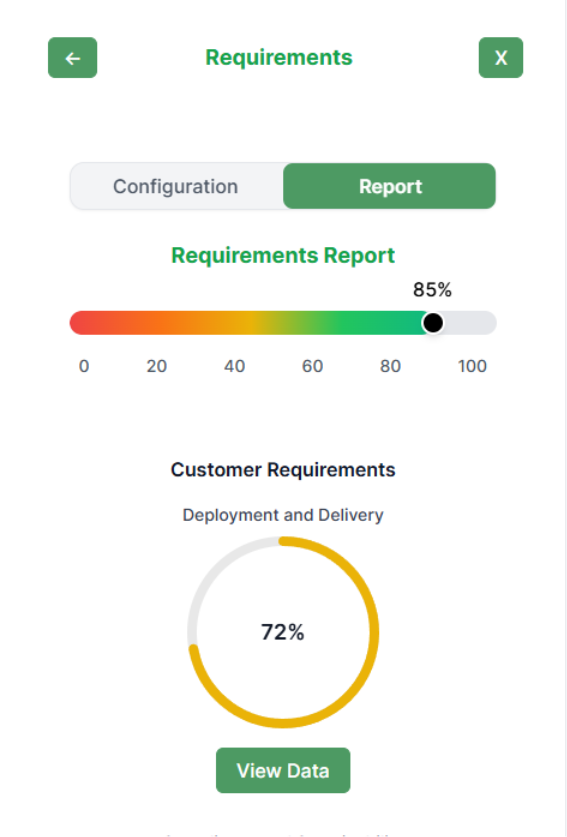
Customer requirements, and sub-categories and weightings – the customer requirements is the title of the sub-category of (requirements) then within the customer requirements category you have sub-categories, for example, deployment and delivery. Each has its own weighting for example, deployment and delivery – weighting 34%. Within these sub-categories there are specific, questions which we will cover further down, when we cover the report button.
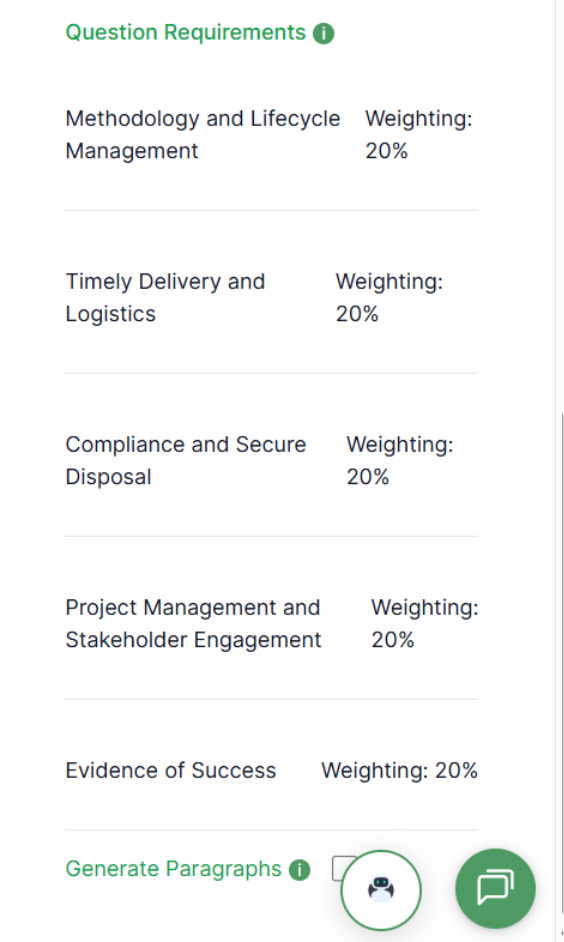
Question requirements – as you can see in the image below, similar to customer requirements but this is question requirements. Question requirements are assessing the different elements of the question, splitting them up and reviewing them across its sub-categories for example, methodology and lifecycle management, and its weighting 20%.
Generate paragraphs – you will see at the bottom of the image, generated paragraphs – this allows you to create content based off the analysis review and against the customer documentation you uploaded.
Create in requirements
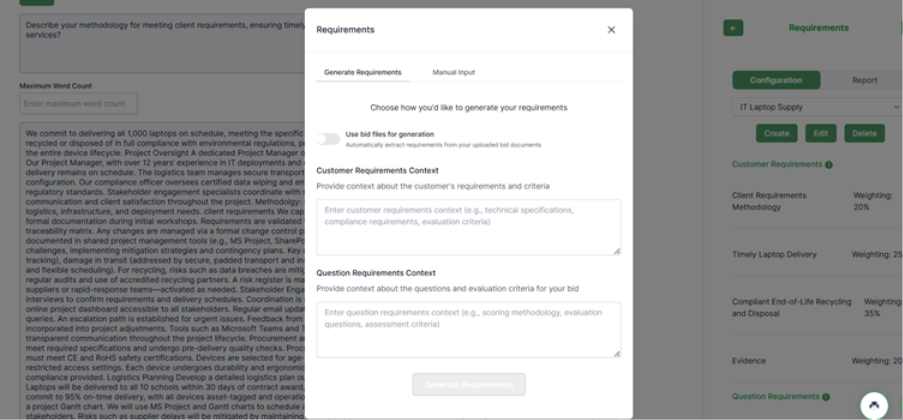
By clicking create in requirements, you will see the image below.
You will see generate requirements and manual input – we strongly recommend that you have pre-uploaded your customer documentation – usually the specification and any information regarding the customer background, you could create this document yourself.
Important: if your customer documents have already been put in, you will see next to “use bid files for generation” click the toggle option, and it will run off the review analysis off the customer documents.
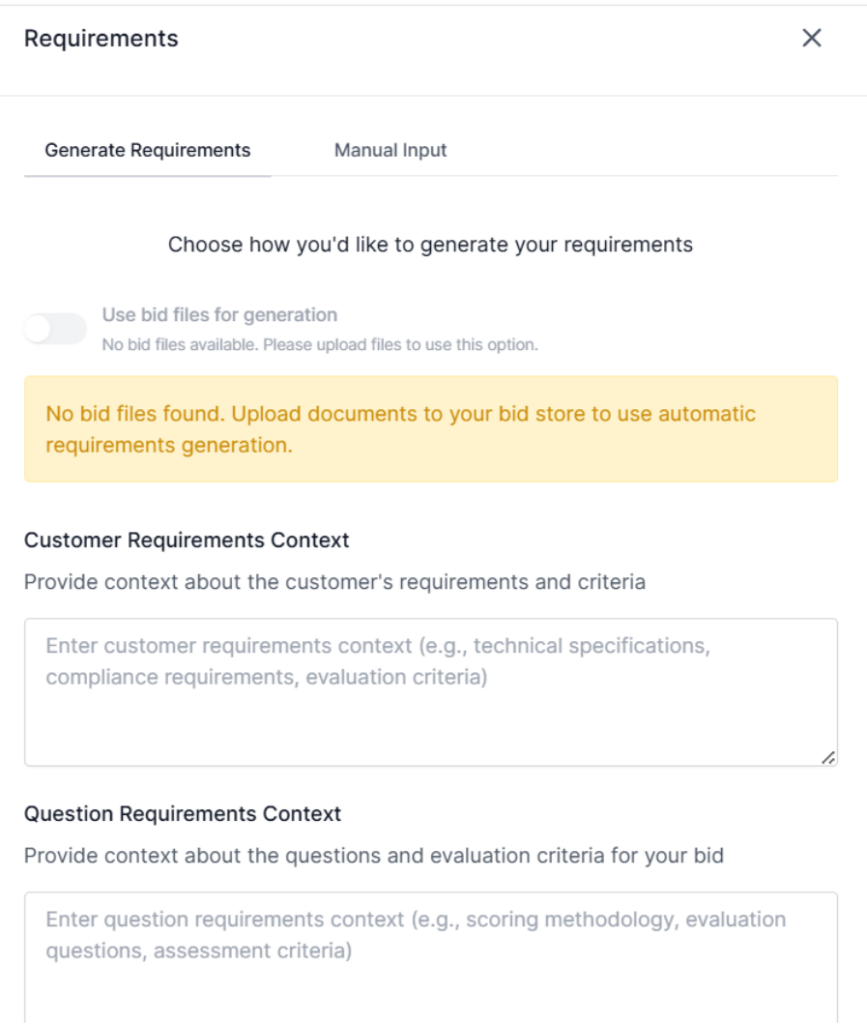
If the platform does not have your documents, you will see the image below. If you see this, go back to the bid page, press on edit and double-check they are present if not upload them.
Generate requirements – once you have clicked the use bid files for generation, you will then see the box at the bottom of the page in green stating “generate requirements”. If it is not in green as you see below, this is because the action is not complete.

Important – remember you can always click the green message chat on the side for support.

Edit option (create, edit, delete):
- Click create to make new requirements
- Click edit to change existing requirements
- Click delete to remove this requirements
If you head back to the requirements section on the sidebar and click on edit as below.
You will then be on the edit page as below.
Requirements name and X – the requirements are the name of this category section. The X allows you to click off this page and back to the requirements sidebar.
Name and box – this is where you will see the name for your requirements review criteria created – you can change the name in here.

Add and remove categories – below you will see buttons to add and remove categories. Please note, currently the remove category will remove the latest category so in this instance, this is experience and value. You will see drop down boxes for example, deployment and delivery, if you click on the arrow, this will open the box up.
When clicking on the box you will see the below:
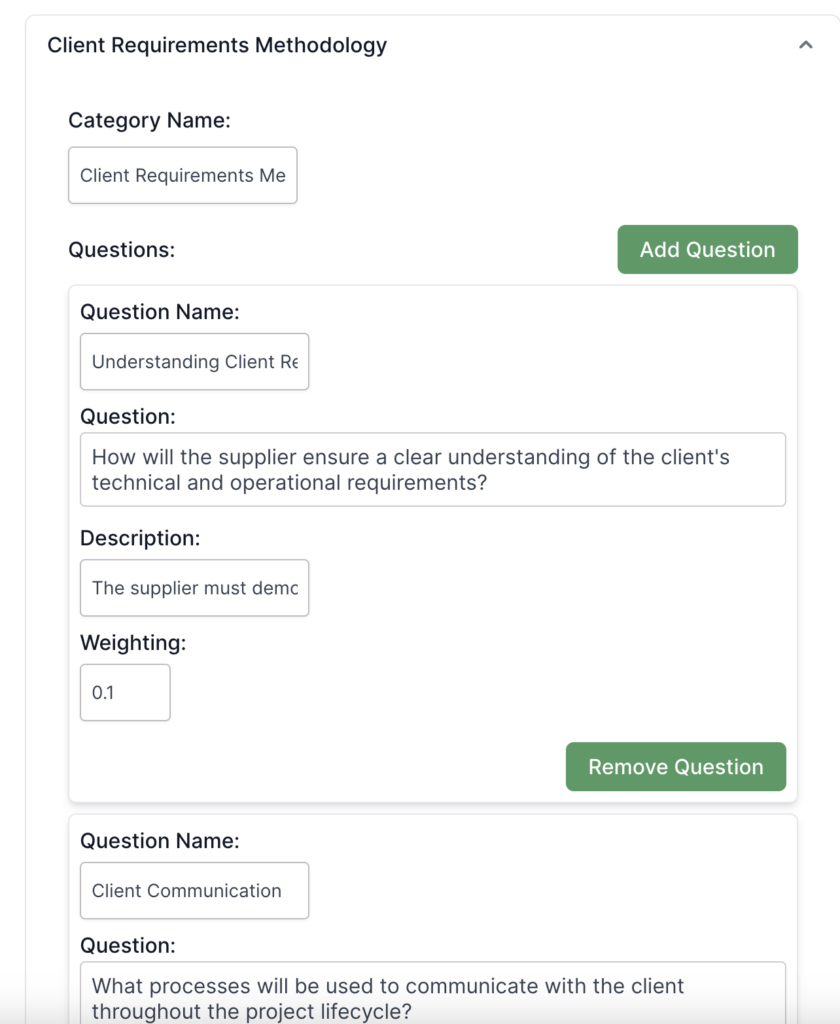
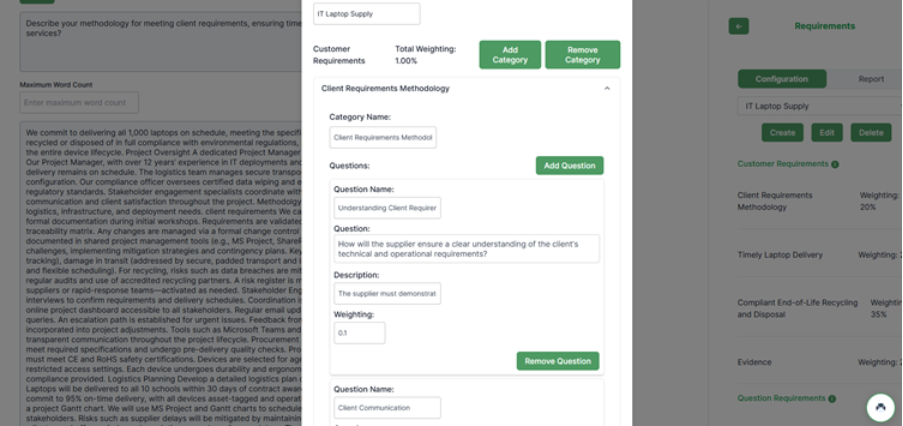
Changing an Existing Category
Here, you will see the sub-category of the customer requirements — for example, Client Requirement Methodology.
You can edit the following fields:
- Question Name
- Question
- Description
- Weighting
If you decide that a sub-category is more important than another, ensure that the total weighting of the category adds up to 1 before saving.
To save your changes, scroll down and click the green “Update” button at the bottom of the popup.
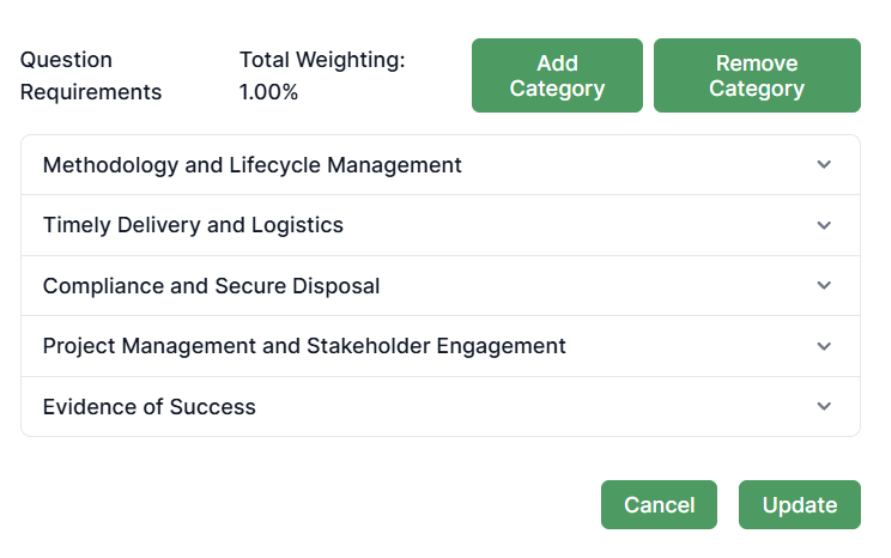
Adding a New Category
When you click the green “Add Category” button, a new entry (e.g. Category 5) will appear on the screen.
Click on the new category to expand the drop-down menu, as shown below.
Fill in all required fields, ensuring that the total weighting for the Customer Requirements Category equals 1 before saving.
The system will not allow you to update the category if the total does not equal 1.
Once you are done, and the weightings add up correctly, click the update box as shown below.
Now if you have changed any categories you will need to re-run the report. To do this, click on the arrow as below on the image.

You will now see the analysis sidebar. To run the reports, click all of the boxes you wish to run the review analysis against – I have ticked them for you. Remember to click into each individual review criteria (requirements, personas, ingredients) if you want to automate content snippets. Then when ready, press the generate report box.

Now you have re-run the report, click on the requirements icon eye, see below.
If you now click on the report box.
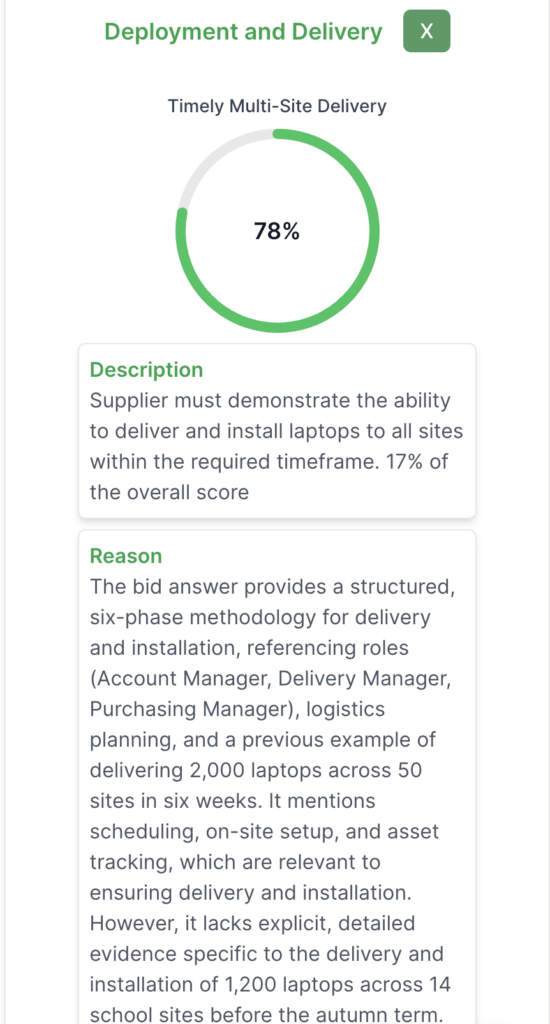
You will see the requirements report. Here you can see your overall score for requirements as well as for each requirement (category). If you click on “View Data” button for the category you are interested in, you will be able to look at how to improve the response based off this requirement.
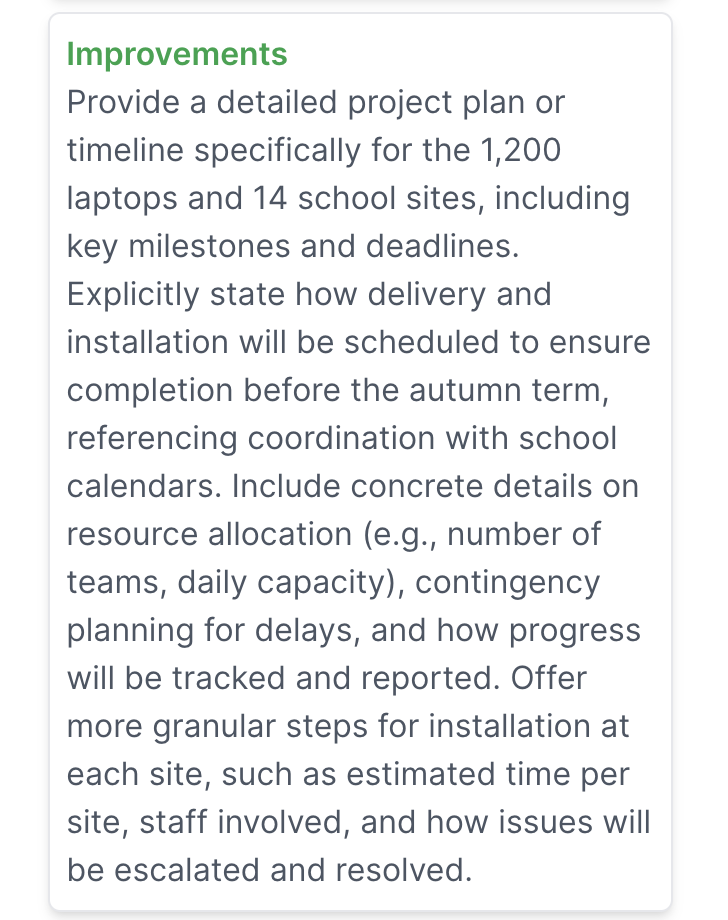
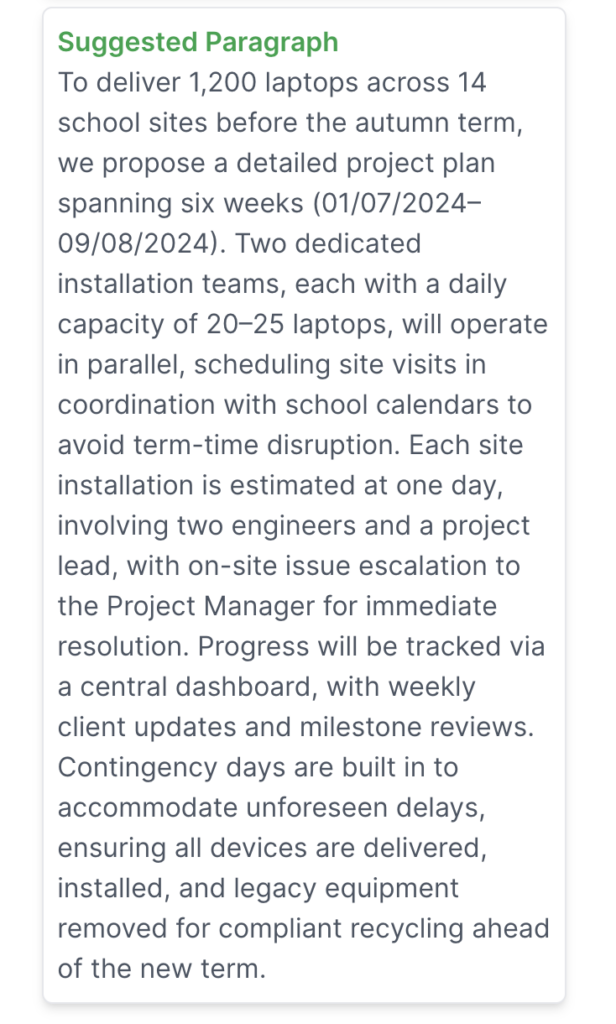
When you open the category, you’ll see a breakdown of several questions, each addressing different aspects needed to meet that requirement. You will see per question the name and description of it as well as its score, reason for its score, suggested improvements to think about, and a suggested paragraph to use. You can press on the X button to come out of this category.