Have a Question?
Creating your Bid Bot Account
Step 1: Open the Sign-Up Page
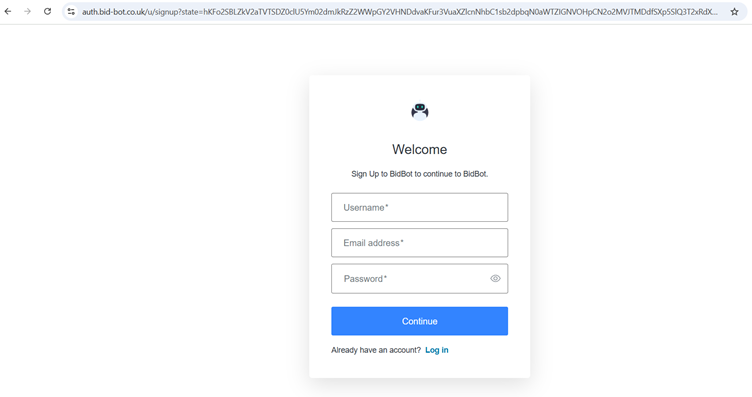
You should see a page that looks like the one in the screenshot — it says “Welcome” and “Sign Up to BidBot.”
Step 2: Enter Your Details
You’ll see three boxes to fill in:
- Username – Type the name you’d like to use for your account.
Tip: Choose something easy for you to remember. - Email address – Type your email (for example, john.smith@email.com).
Make sure this is an email you can access — BidBot will send messages here. - Password – Type a password you will remember.
Click the little “eye” icon 👁 if you want to see what you’re typing.
Step 3: Continue
When all three boxes are filled in, click the blue “Continue” button.
Step 4: Log In (if you already have an account)
If you’ve used BidBot before, click the “Log in” link underneath the button instead.
Step 5: Choose an Account to Continue
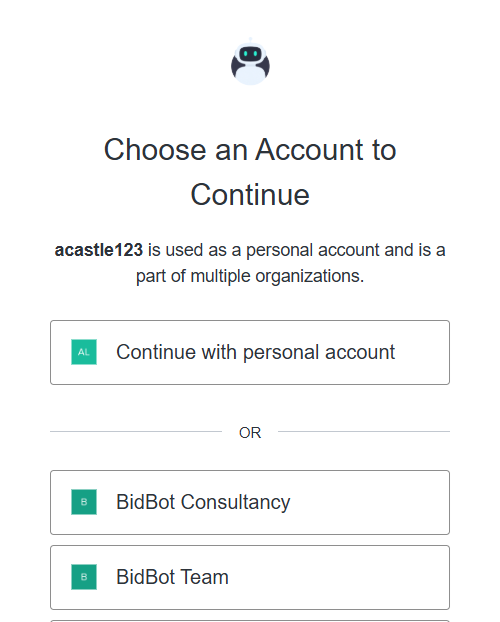
After logging in/creating an account, you will see the screen shown in the screenshot.
What you will see:
- A heading: “Choose an Account to Continue”
- Under your username, a note that your personal account is “part of multiple organisations”.
- Two or more buttons/options:
- Continue with personal account
- One or more organisation accounts (e.g., Client 1, Team Account)
What you should do:
- Read your username at the top to make sure you’re signed in to the correct email.
- Decide which account you want to use right now:
- If you are working for your own business or personal use, click “Continue with personal account”.
- If you are working on behalf of a client or in a team, click the organisation account (e.g., “BidBot Consultancy” or “BidBot Team”).
- Click the button corresponding to your choice.
- Proceed into the system under the selected account.
Step 6: Main platform screen
- After you’ve logged in and selected your account (see Step 5), you will see the main screen of the BidBot platform.
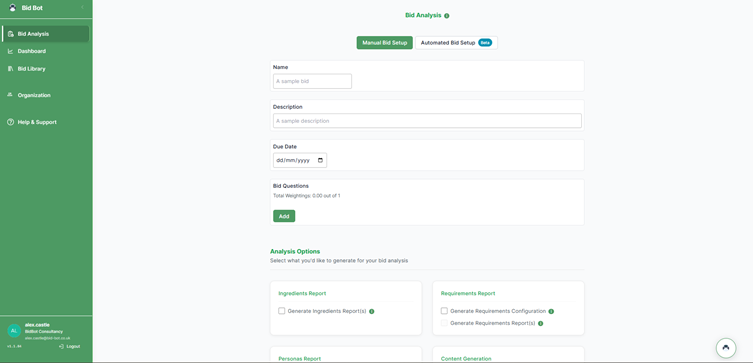
- On the left-hand side you’ll see a green navigation bar. This is your menu to move around the system.
- You might see items like Bid Analysis (bid creation), Dashboard, Bid Library, Organisation, Help & Support.
- The larger area on the right is the workspace. This is where you’ll do tasks like creating a bid, running an analysis, or reviewing results.
- Take a moment now to familiarise yourself:
- If you want to start a new bid, click “Bid Analysis” from the left menu.
- If you want to check your previous and live work click “Bid Library”.
- If you want to view your past bid data, click “Dashboard”
- If you need help or wish to adjust your account settings, click “Help & Support” or “Organisation”.
- You’re now into the platform and ready to start working. The next link will show you exactly how to use the left-hand menu in more detail.